You are using an out of date browser. It may not display this or other websites correctly.
You should upgrade or use an alternative browser.
You should upgrade or use an alternative browser.
Scale Agusta A109
- Thread starter Tony
- Start date


Tony
Staff member
Agusta has servos! I also set the spacing on the shaft holding the bell cranks so they can be tightened without binding. Nothing has threadlocker on it yet but it will. Well, except for those bolts that came from the factory with a bunch of junk on them lol. I need to clean those as well. Just happy to be working on this again.

Tony
Staff member
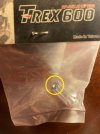
Found something else with this kit.... The pinion that comes with it, cannot slip all the way onto the motor shaft due to there being a lip at the top to stop it. Not sure what motor they expect you to run, but it's a motor that has to have the perfect shaft length on the motor..... hm..... Any ideas?
Also found a nasty little surprise on the grub screw. Yea, it's sharp lol.


The pinion is an easy fix. It's soft aluminum so I can drill that out no problem. But the fact that it's aluminum does have me wanting to get a new pinion. This is the first time I have pulled it out of the package.
And don't take this as complaining, I'm not. Just informing of what is happening with this kit.
Also found a nasty little surprise on the grub screw. Yea, it's sharp lol.
The pinion is an easy fix. It's soft aluminum so I can drill that out no problem. But the fact that it's aluminum does have me wanting to get a new pinion. This is the first time I have pulled it out of the package.
And don't take this as complaining, I'm not. Just informing of what is happening with this kit.
fran11784
Goblin 380 Supporter
Well, I took the Huey down and removed the doghouse so I could see the motor plate. The holes are identical to what you showed at 44.99. However, the frame is only 46mm wide. gezzz. On that pinion, I've seen that before just can't remember where. I think I drilled out that end so it would slide up and down the motor shaft. I may be able to find a pinion in my stash if you get stuck. Pretty sure it's a 600 nitro pinion.
Tony
Staff member
Pinion is drilled out and can go on the shaft where it needs to now.
I went out to the garage and looked for a 1/8" end mill and thankfully bigone5500 had sent me one that was pretty dull, and had one side broke off of it, but still perfectly good for use on aluminum. So it was time. I marked the plate, and did just what I stated, spotted each part then used the cross slide to even it out. I learned one thing... My drill press is most certainly NOT a mill. Absolutely no rigidity in the quill. That bit went walking all over the place, however it was enough to cut a couple slots in my plate. Unfortunately, they are a little wider than intended, but might still work.

I went out to the garage and looked for a 1/8" end mill and thankfully bigone5500 had sent me one that was pretty dull, and had one side broke off of it, but still perfectly good for use on aluminum. So it was time. I marked the plate, and did just what I stated, spotted each part then used the cross slide to even it out. I learned one thing... My drill press is most certainly NOT a mill. Absolutely no rigidity in the quill. That bit went walking all over the place, however it was enough to cut a couple slots in my plate. Unfortunately, they are a little wider than intended, but might still work.
Tony
Staff member
Motor bracket and motor are in. I'm not so sure I fully trust this setup though. I think I may need to practice my autorotations lol.
So the washer is touching one side and I don't think it will move, but I have seen weirder things. The gear mesh seems very loose in that picture due to that gear not being round at all. I have the tightest position as tight as I can possibly get it, and this is the gap that is left.
Surprisingly, the pinion spins with very little run-out. I'm surprised.


Tony
Staff member
And the head and swash has been taken apart, oil removed from the bolts and new thread locker applied. The only thing the head needs now is that new 4.7mm ball reaming tool to size the linkage ends to keep them from binding like they are.
Change of plans. I had only measured a couple of the balls, and they both measured 4.7mm. I just found some that are 4.68mm and the linkage is loose on them. Then, I found some that are 5mm. What? I don't get why there are 3 different size balls on this helicopter. So with that, I think I need to cancel my order for the ball reamer, and just order a full pack of balls and ends that I know are the right size. Guess I might as well get known good swash driver arms as well. Never had this happen before, even with HK kits. If I'm missing something, and possibly have something mixed up, let me know.
But it has been fun sitting down and just building again. Been a while since I did this.
fran11784
Goblin 380 Supporter
Damm bro, I'm so sorry about that kit. Must have been put together on a Friday afternoon. lol. I have used two of them over the years with none of the crap you're seeing. As I was looking though all my older stuff, I found a new in the Align bag pinion. It has one side closed up smaller. I guess that's the way they are. The plate looks pretty good from the picture. I don't see why that wouldn't work. Definitely a pod and boom test flight first.... lol
Attachments
James M. Lewis
Armed Forces
Guess the old saying: one size fits all is truly a mythHm... I think Murphy has been talking to this helicopter in their free time. Turns out, the Align 730MX's bolt pattern is wider than the bolt holes on the motor plate... Not good. And I don't have a mill to make a new plate. hm... Anyone have any ideas?

James M. Lewis
Armed Forces
At least you are making progress on your build. 


 That's what makes this hobby so interesting, the challenges to be able to think outside the box and over come.
You got this Tony
That's what makes this hobby so interesting, the challenges to be able to think outside the box and over come.You got this Tony
Tony
Staff member
lol, it seems that way, or a Monday morning...Damm bro, I'm so sorry about that kit. Must have been put together on a Friday afternoon
And yes, I am having fun with it and that is what matters. I'm not too worried about buying new balls and ends for it as I was wanting new ends anyway as I don't trust the chinese made ends at all. But having to replace all of the balls, that one did catch me off a little bit. All good though, they are not that expensive.
I was sitting here looking at it last night, and I'm not sure where I want to put the ESC. If I don't run a fan on it, I can put it under the motor on the bottom plate. But if I run the fan, it will have to go in front of or behind the motor, or on the side, which I'm trying to avoid. Not sure how hot it is going to get.

D.O.G.
Goblin 380 Supporter
I'll take a guess...servo connectors to hold the servos to the frame? I have square ones for my servo holder.


bigone5500
Well-Known Member
So looks like Tony got tired of helis and started printing Legos... LOL!99.9% sure that is not what they are for as there were 2 of those included with this kit. Yes, 2, not 8 which are required, but 2 lol. So I 3d printed them lol.
View attachment 24764
D.O.G.
Goblin 380 Supporter
So looks like @Tony got tired of helis and started printing Legos... LOL!

Tony
Staff member
Lego's, a parents worst nightmare at night....
Well, got bored at work so decided to do a little work to the 600, mainly due to this comment lol
But I could not resist. I put the skids on it which will not stay on, I put the tail supports, horz and vert fins on it which will not be on it in the fuse, and I pulled her air back for a photo.
I think I need to clean that shelf lol. Not enough room.... Maybe I should just get another one.... LOL

Well, got bored at work so decided to do a little work to the 600, mainly due to this comment lol
I think he is correct. With what all has happened with this helicopter, I'm not sticking it into the fuse until I KNOW it will fly lol.Definitely a pod and boom test flight first...
But I could not resist. I put the skids on it which will not stay on, I put the tail supports, horz and vert fins on it which will not be on it in the fuse, and I pulled her air back for a photo.
I think I need to clean that shelf lol. Not enough room.... Maybe I should just get another one.... LOL