danhampson
Member
wow looks like very little damage considering how hard it went in. nice bit of flying before the crash.
That is one nice looking kit. I don't think the packs will stick out. I think i saw a 7.2 at the fun fly. I didn't get any pics so i cant go back and look.
wow looks like very little damage considering how hard it went in. nice bit of flying before the crash.
That looked like a grenade went off in the field
Nice flying
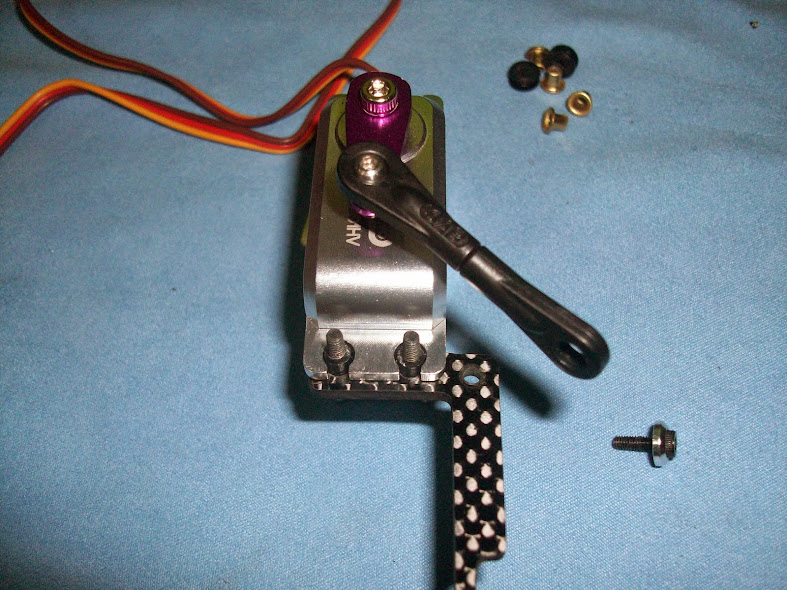
Yeah, that is a lot of space for the servos. Can you make up any shims to place between the bottom of them and the bottom plate, maybe out of wood? Also, did the posts recess properly into the plates? I always find that a problem on the goblin builds (or rebuild as the case is currently).


I had the same issue with the servos in my 570.
I found antenna tubing was the perfect fit to take up the space between the screw and the servo case.
") Thanks Lee
Thanks Lee


 Turns out there is a compatibility issue with the Spektrum sensor and the Castle HV ESC's.


Nice thread and build Marius! Hope you have better luck with those nano-tech 5000mah packs than I did. Mine became useless after half a year. Would sag badly after only 30-60 seconds of flight time.
Here you go Revolectrix
The cost is ab out the same as HK I see. Then it will stand or fall depending on whether they can be shipped to me without import taxes?
But when my friend ordered 6 batteries, he emailed them .